


Add the title of your event here
You don't have to add content most people just add a flyer.
If you are not going to add content go to next step
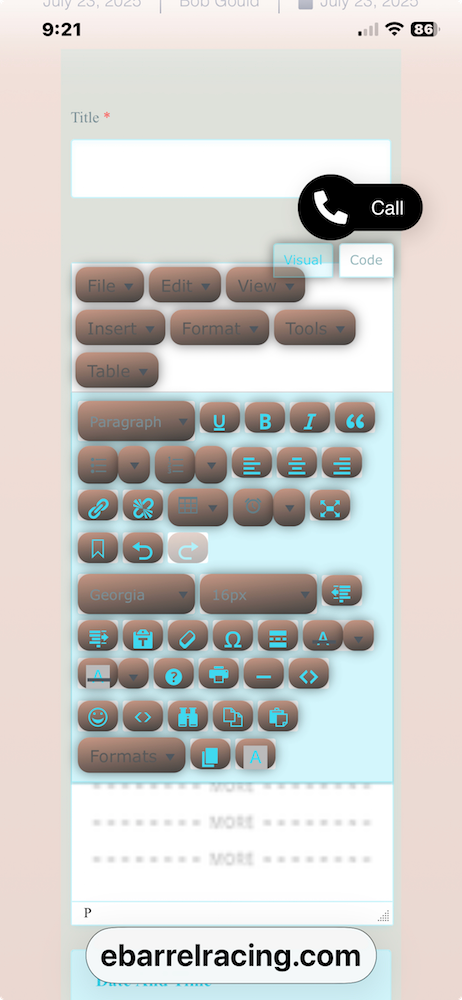
This button switches to html mode so you can paste the html here
This button enables you to copy or paste or paste as text
This button enables to to embed video
(you will have to add a link to video) and tables
This button enables you to add a table
This button changes the header size
This button enables you to change the font
This button enables you to change the font size
Step 3 is adding the start time
click on the words start date and a calendar will appear choose you date then choose the time or choose all day event. If you want you can choose end date and time. If your event has more than one day or it is a series choose repeating event.

Step 4 is Location Name
You can click on the arrow next the word insert a new location the a box will appear once you start typing it will have a list of arenas already on the calendar once you see the arena’s name click on it. If it doesn’t click on the words Location Name and fill it in. You can in as much as you want from there. If the event is going to be at more than one location there is a place for add the location there.

Step 5 Adding an Organizer
Pretty much like adding a location. Click on the arrow beside insert a new organizer and start typing to the organizer shows up or just fill in the info.

Step 6 Upload your flyer
You can skip cost unless you want to add it. Click on the box under the words features image. Then a popup opens that says photo library – take photo or video – choose file. Choosing photo library opens where you keep your photos. Choose a photo then another popup will open with an X on one side and a blue check on the other. Click on the check will upload the photo. Make sure your photo is not over 72 DPI and not over 1000 pixels tall or it won’t upload.
Gallery is if you have like a flyer and and a entry form or whatever other photos that apply to the race.

Step 7 Check your categories
Click the box in front of each category that applies it adds a check showing it has been chosen.

Step 8 hit the submit button.
If you haven’t already put in your email it will ask for it now so if you need to edit it later you can and it will put your events together to make it easier to find them.
If you are wanting to be able to edit your event you have to sign in first (register here). If you add your email after you submit your event the program will not add you to the list and you will have to contact Tamet by phone or email tamet@ebarrelracing.com. For more info on editing your event click here.
